
NSX Multi Hypervisor using vSphere ESXi
There are some great blogs detailing NSX installation and Scott Lowe’s NVP/NSX installation blog is pretty comprehensive, so no need to review all the steps to deploy NSX… The following post covers adding the ESXi Hypervisor to a NSX Multi Hypervisor domain. I do not cover the steps required to add ESXi to OpenStack – that will be a future post…
First some assumptions –
- It’s a lab environment and the lab ESXi host is configured with two 10Gbps NICs. One NIC is dedicated to a vSphere Standard Switch (vSS), and the second NIC will be dedicated to NSX. Production deployments can share multiple NICs between vSS and NSX, or dedicate multiple NICs to vSS and dedicate multiple NICS to NSX.
- vmnic0 is connected to a vSphere Standard Switch (VSS) with management and vmotion port groups. vmnic1 will be used by NSX as a VXLAN Tunnel EndPoint (VTEP) directly connected to an associated VTEP VLAN or via configuration, a trunk can be used and the VLAN specified on the nsxcli command.
- NSX does support NIC bonding. Its pretty simple to do as as step before connecting the uplink to NSX, and I will cover bonding in a separate article.
- All of the steps shown can be automated.
- vSphere ESXi 5.5+
Lab topology as follows:
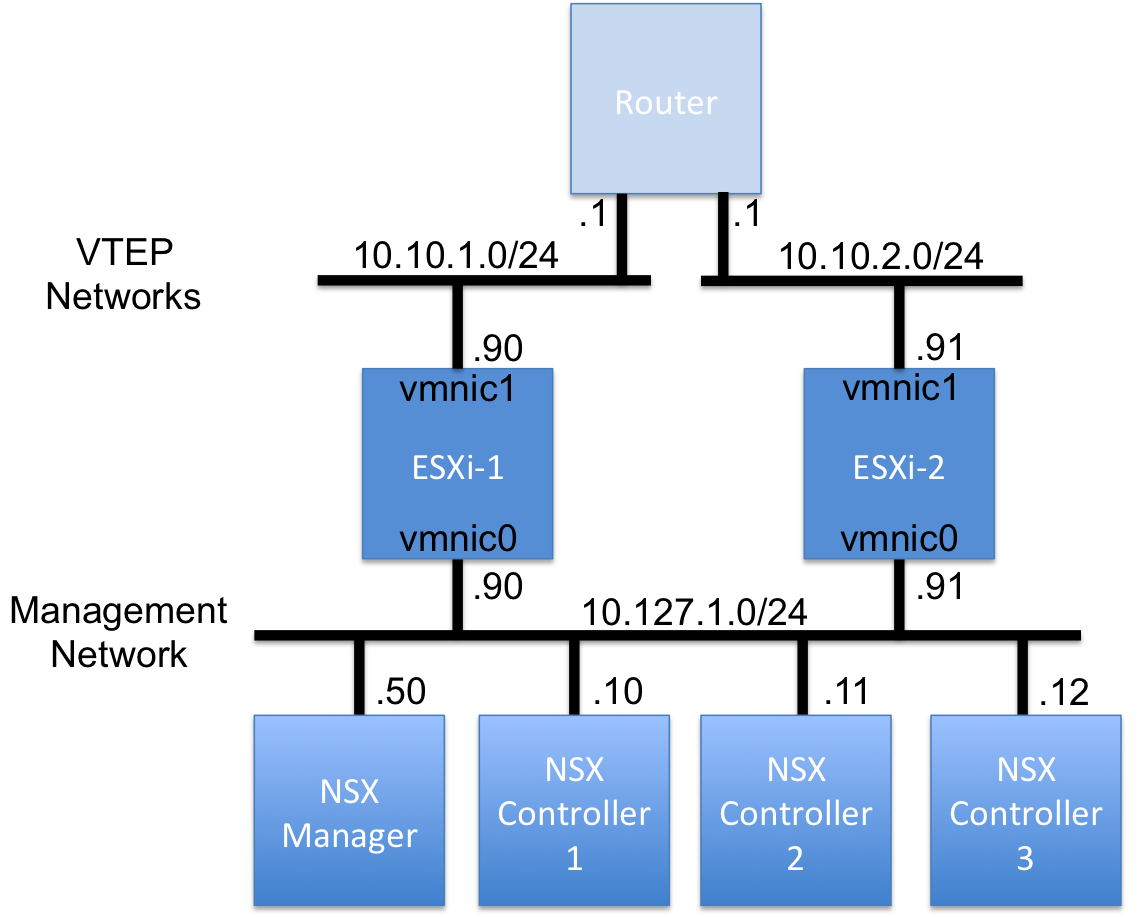
Steps are as follows:
Download and deploy the NSX vSwitch VIB onto the Hypervisor. This is the hardest and the simplest step. Hard in that you need access to the software. Simple in that it is an immediate change not requiring a host reload:
esxcli software vib install -v https://<path-to-vib>/vmware-nsxvswitch-2.3.0-38094-release.vib
Connect vmnic1 to NSX via the nsxcli uplink/connect command and set the IP address on vmnic1 via the nsxcli uplink/set-ip command.This IP address is the VTEP IP address used for logical switch encapsulation.
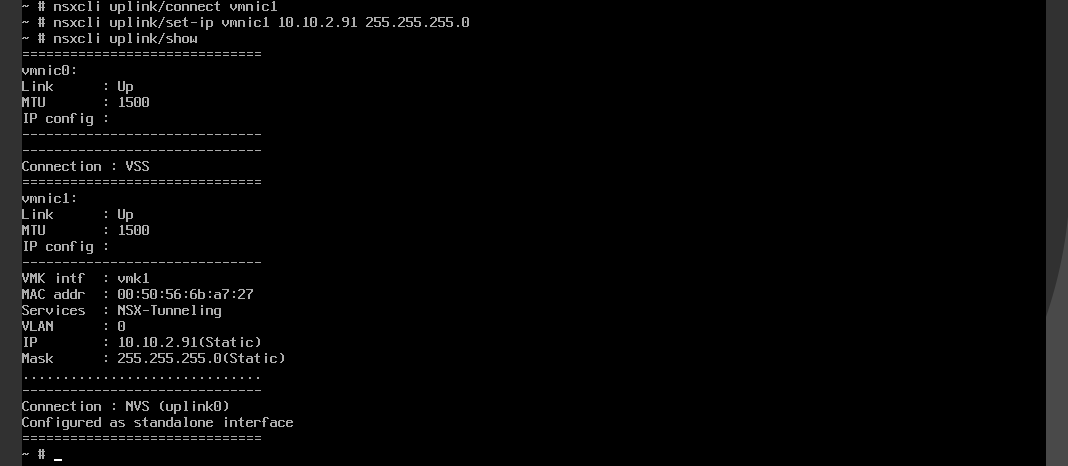
Set the gateway for the tunnel interface using the command nsxcli gw/set tunneling command. Validate with the nsxcli gw/show command:

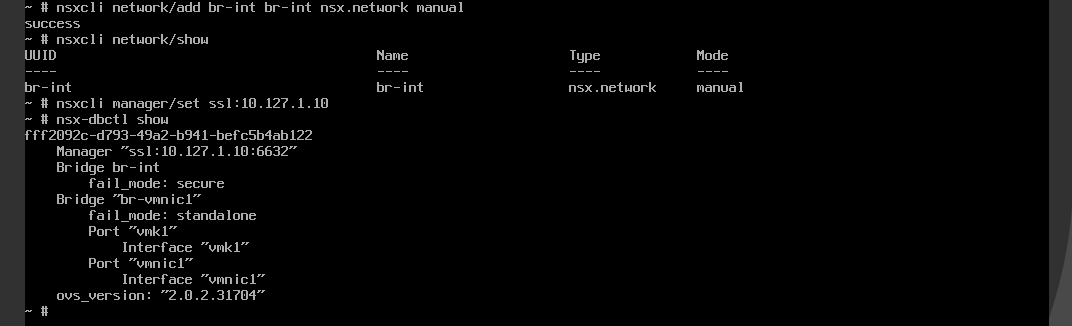
Create a Hypervisor integration bridge (br-int) opaque network attached to the NSX vSwitch with the nsxcli network/add command, and validate using the nsxcli network/show command:
Connect the Hypervisor to the NSX Cluster Controller with the nsxcli manager/set command, and validate with the nsx-dbctl show command:
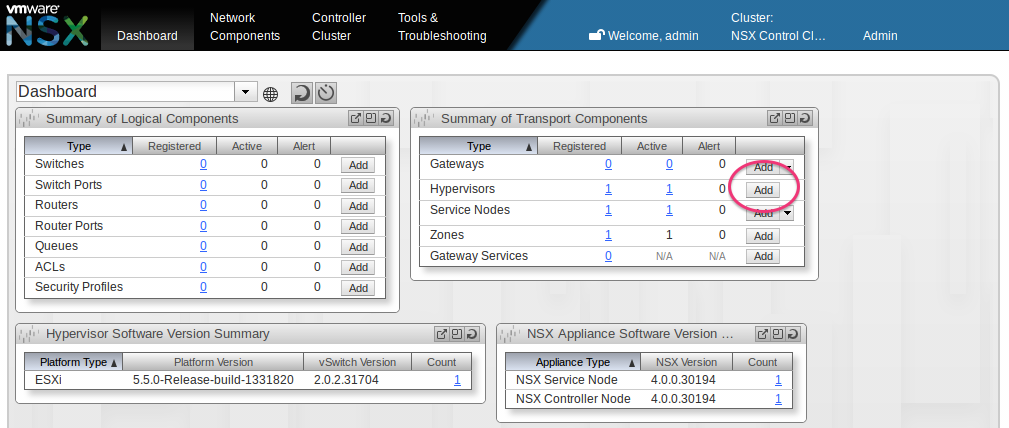
From the NSX Manager Dashboard, Click Hypervisor Add:
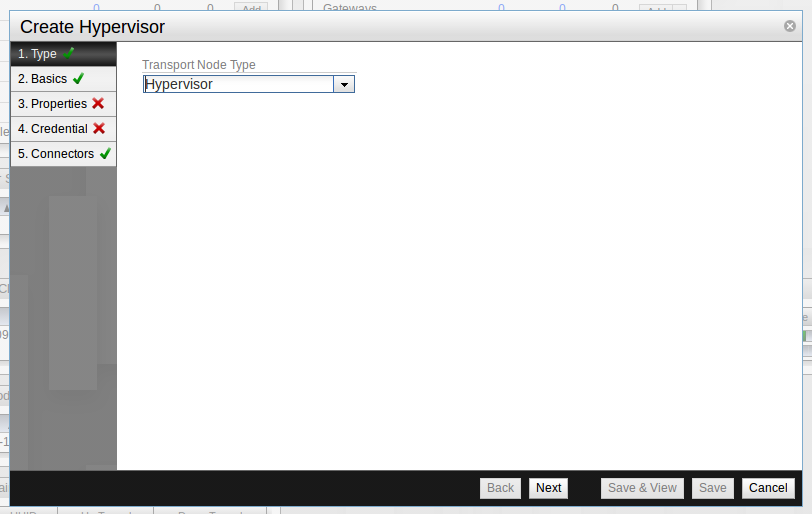
Fill out the details for the Hypervisor:
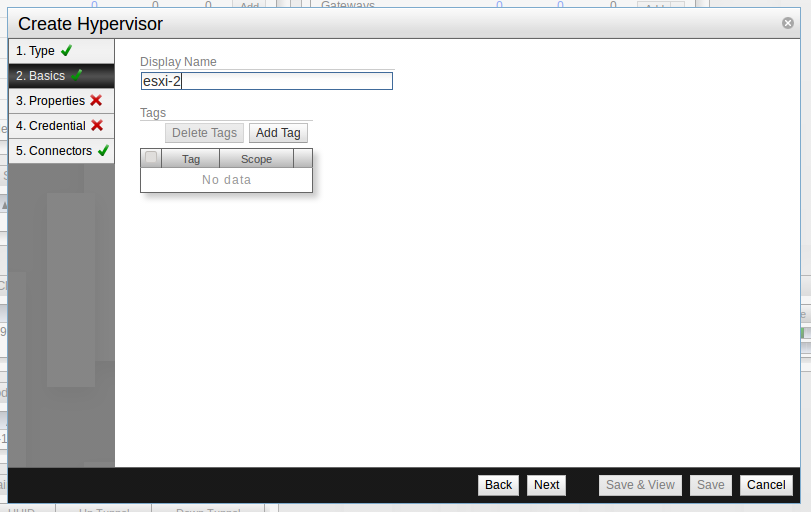
Set the Hypervisor Display Name as listed in the NSX Manager UI:
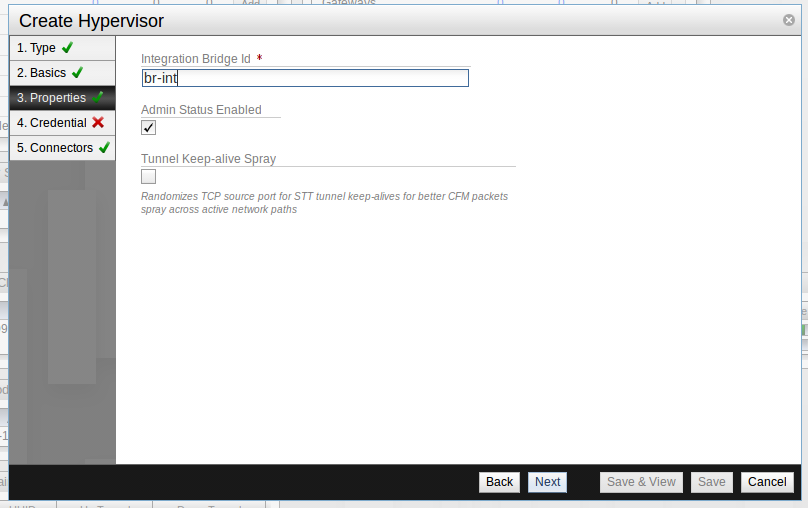
Identify the opaque network:
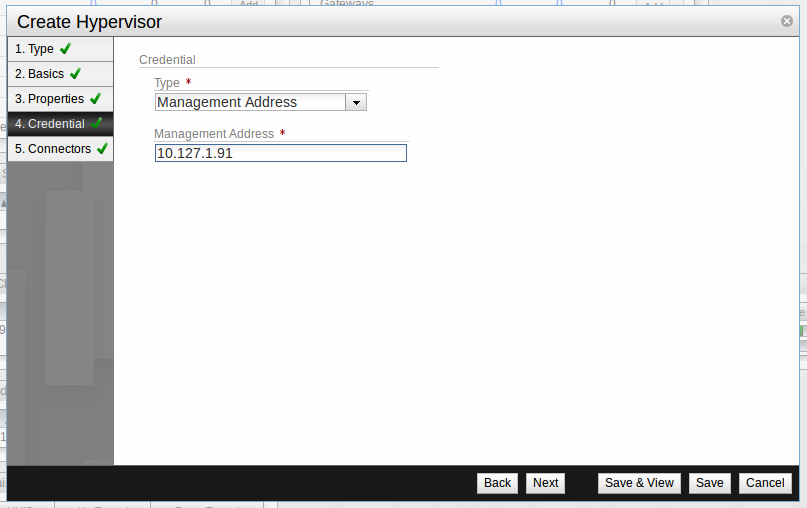
Specify the Hypervisors Management IP Address to establish a secure configuration channel:
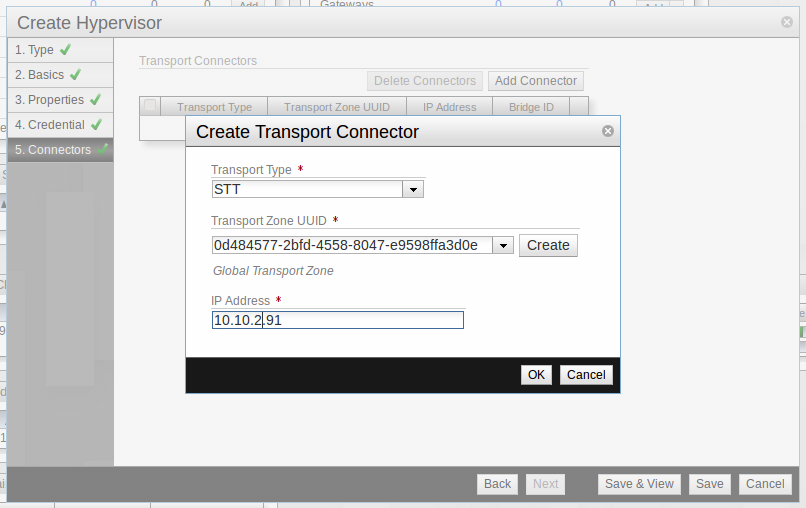
Last step is to connect the Hypervisor to the VTEP network via the NSX Manager. Specify the Transport Connector encapsulation type and connect to a Transport Network. The address specified is the Hypervisor VTEP network address configured in the Hypervisor in an earlier step:
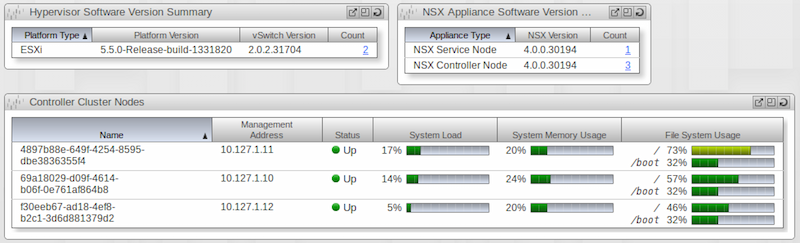
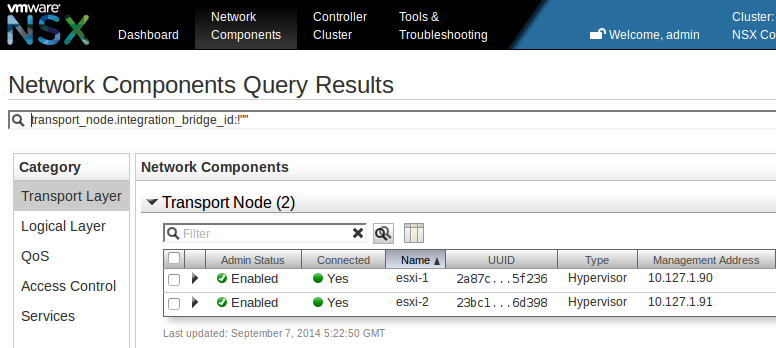
So NSX Manager is happy with two ESXi Hypervisors:
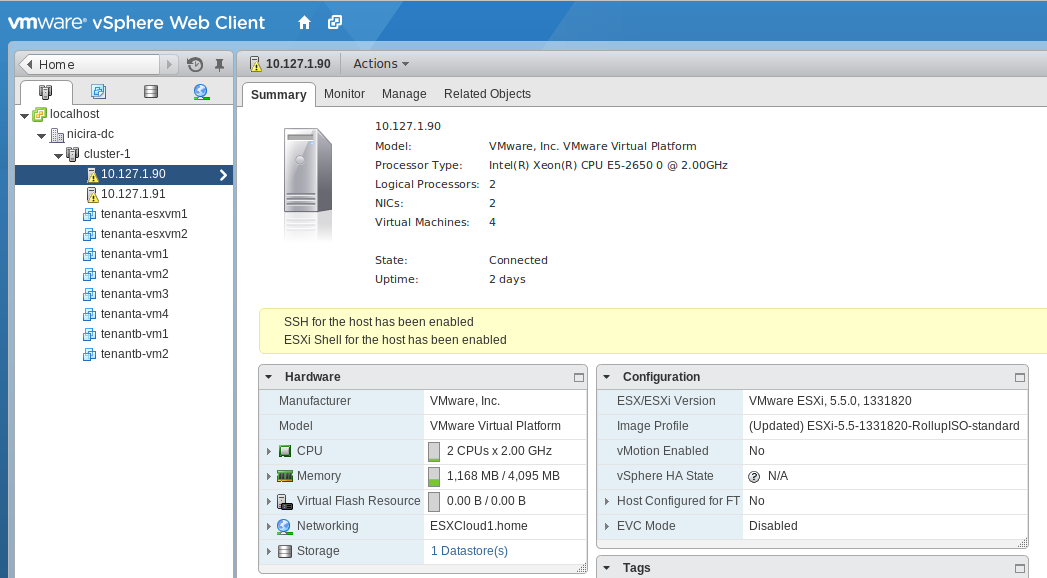
And we have the vSphere Web UI with our Data Center, Cluster, Hypervisor, and VM summary now connected to NSX Multi Hypervisor:
I will detail connecting ESXi VM’s to NSX-MH Logical Switches in a new post 😉